Max Planck’s Magic Glasses #3 (Art & Science) copyright 2026 Douglas Stockdale –
While learning how to use the inkAID pigment ink transfer process, I had a number of opportunities to gain another skill set; how to patch and fix a messed up transfer print. I liken it to my darkroom printing days when at the end of a session, I had a number of silver gelatin prints that had numerous tiny white spots, and required ‘spotting’. Kinda of a similar idea, as even now, this finicky inkAID process still does not always go per plan.
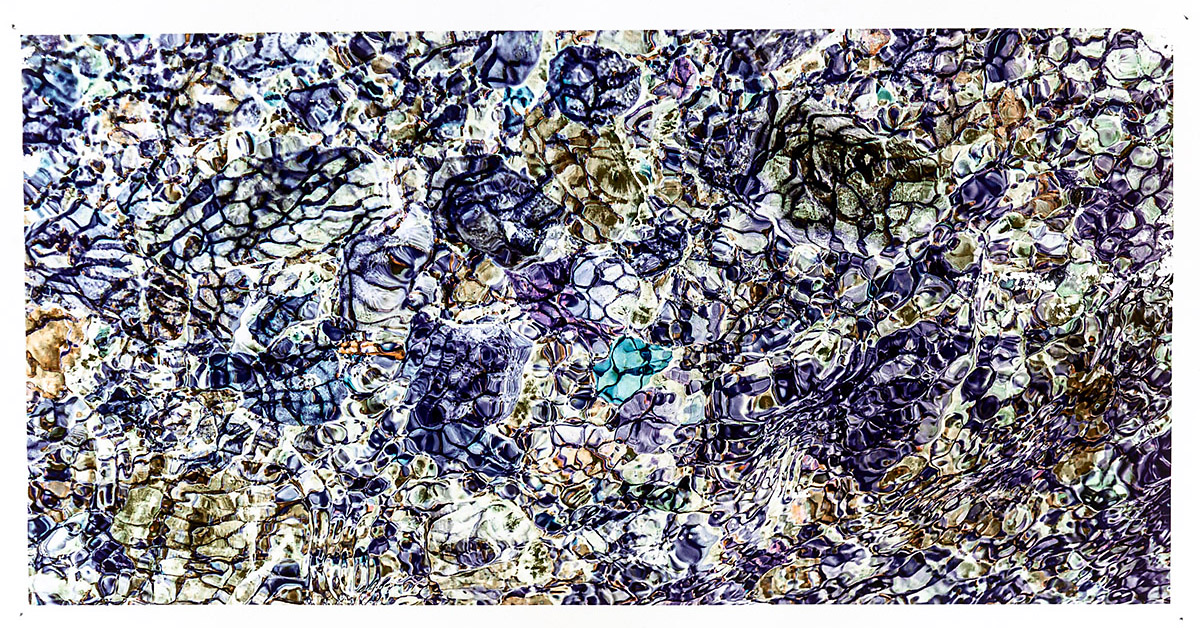
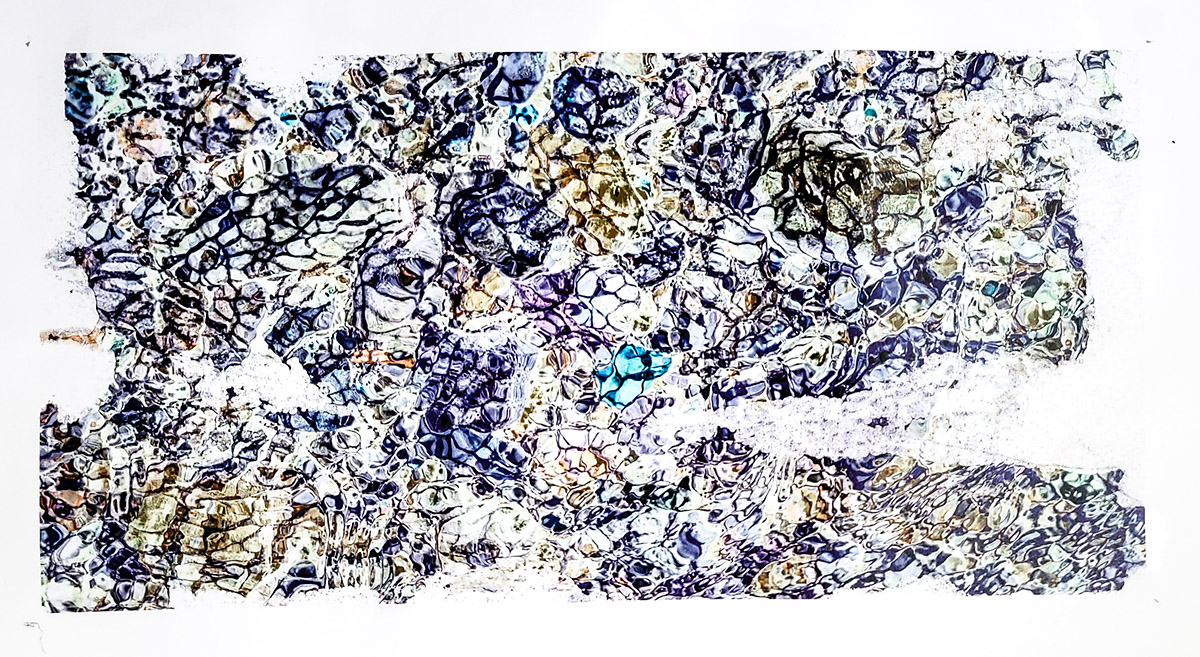
The print from my early large color printing, above, may appear a bit of an extreme, while looking at the patched print, below, you can see the potential to try to patch a messed up transfer print rather than dropping it in the dust bin. And yes, these kinda of things can and will occur to varying degrees with inkAID. To be honest, this is one of my earliest attempts using a 13 x 19″ inkAID transfer sheet while I was still struggling with the inkAID transfer medium issues of absorption and evaporation. This was an ink transfer on an inkjet (matte) paper when I thought this might work. Exactly, it didn’t. Nevertheless, the amount of pigment ink that still remained on the transfer sheet gave me an idea to experiment with; patch fixes!
By this time I had already learned a valuable lesson; putting the inkAID transfer solution back onto a completed transfer print would create even more of a disaster, as the new solution would activate the earlier transfer which would move or get sticky and get pulled up by the transfer film. It’s necessary to seal (coat) the first transfer print layer.
First, I had to allow the messed up transfer print to dry overnight. On the following day, I fog/sprayed a light coating of acrylic medium over the entire print. In this case I used the matte spray from Liquitex, while others seem to work as well. I then allowed that acrylic medium coating layer to dry overnight.
Now I was ready to perform my patch work. With scissors, I cut out a section of the transfer film that still had a large segment of ink because I was going to do this slowly and piece-meal. I did not think I wanted to try to patch all of the un-transferred ink in one fell-swoop. After getting the orientation correct, including which side of the film had the un-transferred ink, I then dabbed a small amount of transfer solution on the area I wanted to transfer, applied the transfer film onto the target spot, quickly patted the film down and hit the timer. For this print, I was initially using a transfer duration of 2 min and 15 seconds, while for the patch, I was using a shorter duration of one and half minutes. After the transfer time was up, picking up an edge of the film, I rolled back the film. Boom! The new transfer was completed while the underlying transfer had not changed. That’s a win-win.
I then repeated this patching process for the remainder of the un-transferred ink. Not all of the additional ink transfer patches were perfect, while the subject of this print allowed for a lot of irregularities. Where the resulting patch still appeared too irregular for my intent, I used some Prismacolor art pencils to color some of the details. Again, the results are below. Pretty amazing, eh?
I think that having this in my bag of tricks for the inkAID transfer process has saved me a lot of grief, time and prints on more than one occasion now. No matter how diligent I attempt to be at this time, there are still some small non-transferred ink details left on the inkAID transfer film and now I do not despair as in a matter of a short amount of time, I have most of the patch(s) completed.
Cheers!
Doug